Saturday 30 January 2021

ASP.NET, Serilog and Application Insights

If you're deploying an ASP.NET application to Azure App Services, there's a decent chance you'll also be using the fantastic Serilog and will want to plug it into Azure's Application Insights.

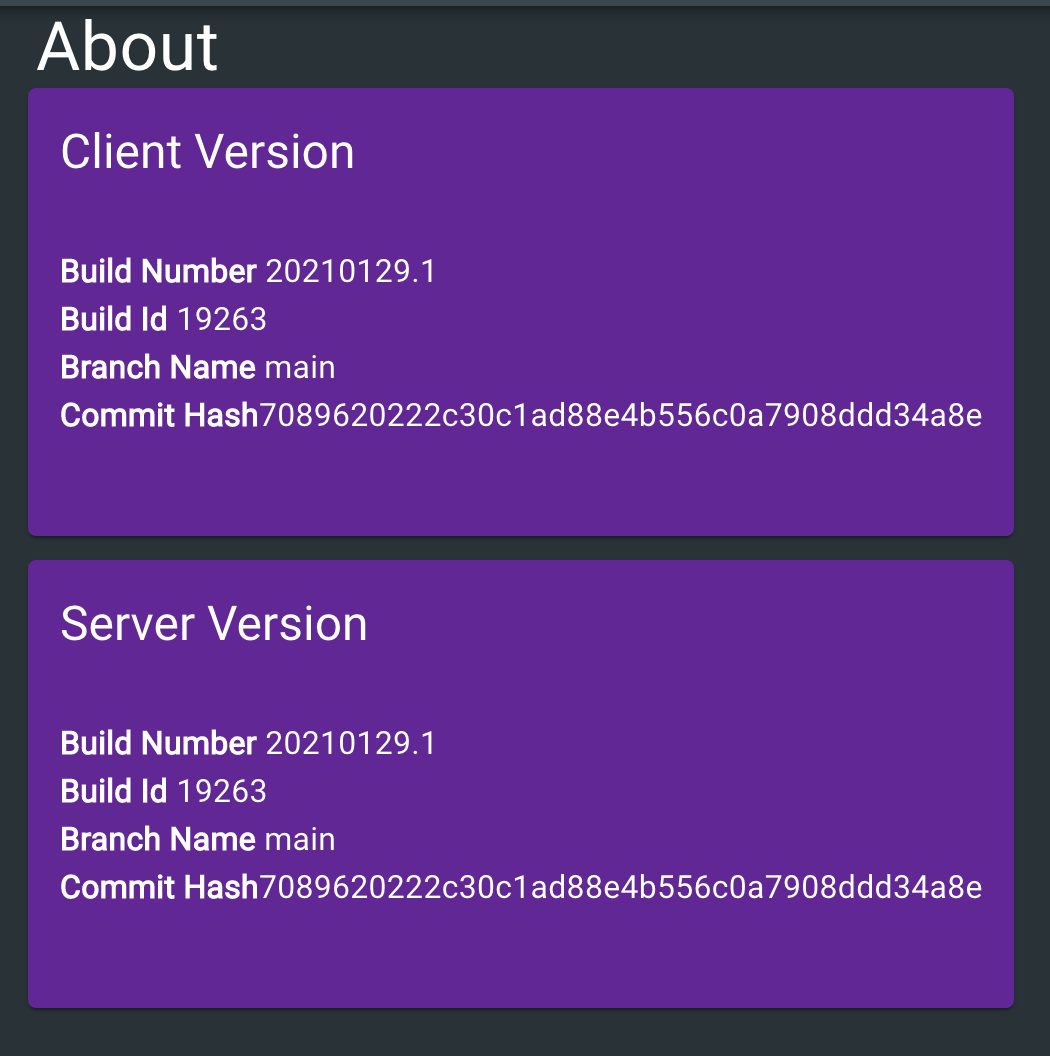
This post will show you how it's done, and it'll also build upon the build info work from our previous post. In what way? Great question. Well logs are a tremendous diagnostic tool. If you have logs which display some curious behaviour, and you'd like to replicate that in another environment, you really want to take exactly that version of the codebase out to play. Our last post introduced build info into our application in the form of our AppVersionInfo class that looks something like this:

{
    "buildNumber": "20210130.1",
    "buildId": "123456",
    "branchName": "main",
    "commitHash": "7089620222c30c1ad88e4b556c0a7908ddd34a8e"
}

We'd initially exposed an endpoint in our application which surfaced up this information. Now we're going to take that self same information and bake it into our log messages by making use of Serilog's enrichment functionality. Build info and Serilog's enrichment are the double act your logging has been waiting for.

Let's plug it together

We're going to need a number of Serilog dependencies added to our .csproj:

    <PackageReference Include="Serilog.AspNetCore" Version="3.4.0" />
    <PackageReference Include="Serilog.Enrichers.Environment" Version="2.1.3" />
    <PackageReference Include="Serilog.Enrichers.Thread" Version="3.1.0" />
    <PackageReference Include="Serilog.Sinks.ApplicationInsights" Version="3.1.0" />
    <PackageReference Include="Serilog.Sinks.Async" Version="1.4.0" />

The earlier in your application lifetime you get logging wired up, the happier you will be. Earlier, means more information when you're diagnosing issues. So we want to start in our Program.cs; Startup.cs would be just way too late.

public class Program {
    const string APP_NAME = "MyAmazingApp";

    public static int Main(string[] args) {
        AppVersionInfo.InitialiseBuildInfoGivenPath(Directory.GetCurrentDirectory());
        LoggerConfigurationExtensions.SetupLoggerConfiguration(APP_NAME, AppVersionInfo.GetBuildInfo());

        try
        {
            Log.Information("Starting web host");
            CreateHostBuilder(args).Build().Run();
            return 0;
        }
        catch (Exception ex)
        {
            Log.Fatal(ex, "Host terminated unexpectedly");
            return 1;
        }
        finally
        {
            Log.CloseAndFlush();
        }
    }

    public static IHostBuilder CreateHostBuilder(string[] args) =>
        Host.CreateDefaultBuilder(args)
            .UseSerilog((hostBuilderContext, services, loggerConfiguration) => {
                loggerConfiguration.ConfigureBaseLogging(APP_NAME, AppVersionInfo.GetBuildInfo());
                loggerConfiguration.AddApplicationInsightsLogging(services, hostBuilderContext.Configuration);
            })
            .ConfigureWebHostDefaults(webBuilder => {
                webBuilder
                    .UseStartup<Startup>();
            });
}

If you look at the code above you'll see that the first line of code that executes is AppVersionInfo.InitialiseBuildInfoGivenPath. This initialises our AppVersionInfo so we have meaningful build info to pump into our logs. The next thing we do is to configure Serilog with LoggerConfigurationExtensions.SetupLoggerConfiguration. This provides us with a configured logger so we are free to log any issues that take place during startup. (Incidentally, after startup you'll likely inject an ILogger into your classes rather than using the static Log directly.)

Finally, we call CreateHostBuilder which in turn calls UseSerilog to plug Serilog into ASP.NET. If you take a look inside the body of UserSerilog you'll see we configure the logging of ASP.NET (in the same we did for Serilog) and we hook into Application Insights as well. There's been a number of references to LoggerConfigurationExtensions. Let's take a look at it:

internal static class LoggerConfigurationExtensions {
    internal static void SetupLoggerConfiguration(string appName, BuildInfo buildInfo) {
        Log.Logger = new LoggerConfiguration()
            .ConfigureBaseLogging(appName, buildInfo)
            .CreateLogger();
    }

    internal static LoggerConfiguration ConfigureBaseLogging(
        this LoggerConfiguration loggerConfiguration,
        string appName,
        BuildInfo buildInfo
    ) {
        loggerConfiguration
            .MinimumLevel.Debug()
            .MinimumLevel.Override("Microsoft", LogEventLevel.Information)
            // AMAZING COLOURS IN THE CONSOLE!!!!
            .WriteTo.Async(a => a.Console(theme: AnsiConsoleTheme.Code))
            .Enrich.FromLogContext()
            .Enrich.WithMachineName()
            .Enrich.WithThreadId()
            // Build information as custom properties
            .Enrich.WithProperty(nameof(buildInfo.BuildId), buildInfo.BuildId)
            .Enrich.WithProperty(nameof(buildInfo.BuildNumber), buildInfo.BuildNumber)
            .Enrich.WithProperty(nameof(buildInfo.BranchName), buildInfo.BranchName)
            .Enrich.WithProperty(nameof(buildInfo.CommitHash), buildInfo.CommitHash)
            .Enrich.WithProperty("ApplicationName", appName);

        return loggerConfiguration;
    }

    internal static LoggerConfiguration AddApplicationInsightsLogging(this LoggerConfiguration loggerConfiguration, IServiceProvider services, IConfiguration configuration)
    {
        if (!string.IsNullOrWhiteSpace(configuration.GetValue<string>("APPINSIGHTS_INSTRUMENTATIONKEY")))
        {
            loggerConfiguration.WriteTo.ApplicationInsights(
                services.GetRequiredService<TelemetryConfiguration>(),
                TelemetryConverter.Traces);
        }

        return loggerConfiguration;
    }
}

If we take a look at the ConfigureBaseLogging method above, we can see that our logs are being enriched with the build info, property by property. We're also giving ourselves a beautifully coloured console thanks to Serilog's glorious theme support:

Take a moment to admire the salmon pinks. Is it not lovely?

Finally we come to the main act. Plugging in Application Insights is as simple as dropping in loggerConfiguration.WriteTo.ApplicationInsights into our configuration. You'll note that this depends upon the existence of an application setting of APPINSIGHTS_INSTRUMENTATIONKEY - this is the secret sauce that we need to be in place so we can pipe logs merrily to Application Insights. So you'll need this configuration in place so this works.

As you can see, we now have the likes of BuildNumber, CommitHash and friends visible on each log. Happy diagnostic days!

I'm indebted to the marvellous Marcel Michau who showed me how to get the fiddlier parts of how to get Application Insights plugged in the right way. Thanks chap!

Friday 29 January 2021

Surfacing Azure Pipelines Build Info in a .NET React SPA

The title of this post is hugely specific, but the idea is simple. We want to answer the question: "what codebase is running in Production right now?" Many is the time where I've been pondering over why something isn't working as expected and burned a disappointing amount of time before realising that I'm playing with an old version of an app. Wouldn't it be great give our app a way to say: "Hey! I'm version 1.2.3.4 of your app; built from this commit hash, I was built on Wednesday, I was the nineth build that day and I was built from the main branch. And I'm an Aries." Or something like that.

This post was inspired by Scott Hanselman's similar post on the topic. Ultimately this ended up going in a fairly different direction and so seemed worthy of a post of its own.

A particular difference is that this is targeting SPAs. Famously, cache invalidation is hard. It's possible for the HTML/JS/CSS of your app to be stale due to aggressive caching. So we're going to make it possible to see build information for both when the SPA (or "client") is built, as well as when the .NET app (or "server") is built. We're using a specific type of SPA here; a React SPA built with TypeScript and Material UI, however the principles here are general; you could surface this up any which way you choose.

Putting build info into azure-pipelines.yml

The first thing we're going to do is to inject our build details into two identical buildinfo.json files; one that sits in the server codebase and which will be used to drive the server build information, and one that sits in the client codebase to drive the client equivalent. They'll end up looking something like this:

{
    "buildNumber": "20210130.1",
    "buildId": "123456",
    "branchName": "main",
    "commitHash": "7089620222c30c1ad88e4b556c0a7908ddd34a8e"
}

We generate this by adding the following yml to the beginning of our azure-pipelines.yml (crucially before the client or server build take place):

        - script: |
            echo -e -n "{\"buildNumber\":\"$(Build.BuildNumber)\",\"buildId\":\"$(Build.BuildId)\",\"branchName\":\"$(Build.SourceBranchName)\",\"commitHash\":\"$(Build.SourceVersion)\"}" > "$(Build.SourcesDirectory)/src/client-app/src/buildinfo.json"
            echo -e -n "{\"buildNumber\":\"$(Build.BuildNumber)\",\"buildId\":\"$(Build.BuildId)\",\"branchName\":\"$(Build.SourceBranchName)\",\"commitHash\":\"$(Build.SourceVersion)\"}" > "$(Build.SourcesDirectory)/src/server-app/Server/buildinfo.json"
          displayName: "emit build details as JSON"
          failOnStderr: true

As you can see, we're placing the following variables that are available at build time in Azure Pipelines, into the buildinfo.json:

  • BuildNumber - The name of the completed build; which usually takes the form of a date in the yyyyMMdd format, suffixed by .x where x is a number that increments representing the number of builds that have taken place on the given day.
  • BuildId - The ID of the record for the completed build.
  • SourceVersion - This is the commit hash of the source code in Git
  • SourceBranchName - The name of the branch in Git.

There's many variables available in Azure Pipelines that can be used - we've picked out the ones most interesting to us.

Surfacing the server build info

Our pipeline is dropping the buildinfo.json over pre-existing stub buildinfo.json files in both our client and server codebases. The stub files look like this:

{
    "buildNumber": "yyyyMMdd.x",
    "buildId": "xxxxxx",
    "branchName": "",
    "commitHash": "LOCAL_BUILD"
}

In our .NET app, the buildinfo.json file has been dropped in the root of the app. And as luck would have it, all JSON files are automatically included in a .NET build and so it will be available at runtime. We want to surface this file through an API, and we also want to use it to stamp details into our logs.

So we need to parse the file, and for that we'll use this:

using System;
using System.IO;
using System.Text.Json;

namespace Server {
    public record BuildInfo(string BranchName, string BuildNumber, string BuildId, string CommitHash);

    public static class AppVersionInfo {
        private const string _buildFileName = "buildinfo.json";
        private static BuildInfo _fileBuildInfo = new(
            BranchName: "",
            BuildNumber: DateTime.UtcNow.ToString("yyyyMMdd") + ".0",
            BuildId: "xxxxxx",
            CommitHash: $"Not yet initialised - call {nameof(InitialiseBuildInfoGivenPath)}"
        );

        public static void InitialiseBuildInfoGivenPath(string path) {
            var buildFilePath = Path.Combine(path, _buildFileName);
            if (File.Exists(buildFilePath)) {
                try {
                    var buildInfoJson = File.ReadAllText(buildFilePath);
                    var buildInfo = JsonSerializer.Deserialize<BuildInfo>(buildInfoJson, new JsonSerializerOptions {
                        PropertyNamingPolicy = JsonNamingPolicy.CamelCase
                    });
                    if (buildInfo == null) throw new Exception($"Failed to deserialise {_buildFileName}");

                    _fileBuildInfo = buildInfo;
                } catch (Exception) {
                    _fileBuildInfo = new BuildInfo(
                        BranchName: "",
                        BuildNumber: DateTime.UtcNow.ToString("yyyyMMdd") + ".0",
                        BuildId: "xxxxxx",
                        CommitHash: "Failed to load build info from buildinfo.json"
                    );
                }
            }
        }

        public static BuildInfo GetBuildInfo() => _fileBuildInfo;
    }
}

The above code reads the buildinfo.json file and deserialises it into a BuildInfo record which is then surfaced up by the GetBuildInfo method. We initialise this at the start of our Program.cs like so:

        public static int Main(string[] args) {
            AppVersionInfo.InitialiseBuildInfoGivenPath(Directory.GetCurrentDirectory());
            // Now we're free to call AppVersionInfo.GetBuildInfo()
            // ....
        }

Now we need a controller to surface this information up. We'll add ourselves a BuildInfoController.cs:

using Microsoft.AspNetCore.Authorization;
using Microsoft.AspNetCore.Mvc;

namespace Server.Controllers {
    [ApiController]
    public class BuildInfoController : ControllerBase {
        [AllowAnonymous]
        [HttpGet("api/build")]
        public BuildInfo GetBuild() => AppVersionInfo.GetBuildInfo();
    }
}

This exposes an api/build endpoint in our .NET app that, when hit, will display the following JSON:

Surfacing the client build info

Our server now lets the world know which version it is running and this is tremendous. Now let's make our client do the same.

Very little is required to achieve this. Again we have a buildinfo.json sat in the root of our codebase. We're able to import it as a module in TypeScript because we've set the following property in our tsconfig.json:

        "resolveJsonModule": true,

As a consequence, consumption is as simple as:

import clientBuildInfo from './buildinfo.json';

Which provides us with a clientBuildInfo which TypeScript automatically derives as this type:

type ClientBuildInfo = {
    buildNumber: string;
    buildId: string;
    branchName: string;
    commitHash: string;
}

How you choose to use that information is entirely your choice. We're going to add ourselves an "about" screen in our app, which displays both client info (loaded using the mechanism above) and server info (fetched from the /api/build endpoint).

import {
    Card,
    CardContent,
    CardHeader,
    createStyles,
    Grid,
    makeStyles,
    Theme,
    Typography,
    Zoom,
} from '@material-ui/core';
import React from 'react';
import clientBuildInfo from '../../buildinfo.json';
import { projectsPurple } from '../shared/colors';
import { Loading } from '../shared/Loading';
import { TransitionContainer } from '../shared/TransitionContainer';

const useStyles = (cardColor: string) =>
    makeStyles((theme: Theme) =>
        createStyles({
            card: {
                padding: theme.spacing(0),
                backgroundColor: cardColor,
                color: theme.palette.common.white,
                minHeight: theme.spacing(28),
            },
            avatar: {
                backgroundColor: theme.palette.getContrastText(cardColor),
                color: cardColor,
            },
            main: {
                padding: theme.spacing(2),
            },
        })
    )();

type Styles = ReturnType<typeof useStyles>;

const AboutPage: React.FC = () => {
    const [serverBuildInfo, setServerBuildInfo] = React.useState<typeof clientBuildInfo>();

    React.useEffect(() => {
        fetch('/api/build')
            .then((response) => response.json())
            .then(setServerBuildInfo);
    }, []);

    const classes = useStyles(projectsPurple);

    return (
        <TransitionContainer>
            <Grid container spacing={3}>
                <Grid item xs={12} sm={12} container alignItems="center">
                    <Grid item>
                        <Typography variant="h4" component="h1">
                            About
                        </Typography>
                    </Grid>
                </Grid>
            </Grid>
            <Grid container spacing={1}>
                <BuildInfo classes={classes} title="Client Version" {...clientBuildInfo} />
            </Grid>
            <br />
            <Grid container spacing={1}>
                {serverBuildInfo ? (
                    <BuildInfo classes={classes} title="Server Version" {...serverBuildInfo} />
                ) : (
                    <Loading />
                )}
            </Grid>
        </TransitionContainer>
    );
};

interface Props {
    classes: Styles;
    title: string;
    branchName: string;
    buildNumber: string;
    buildId: string;
    commitHash: string;
}

const BuildInfo: React.FC<Props> = ({ classes, title, branchName, buildNumber, buildId, commitHash }) => (
    <Zoom mountOnEnter unmountOnExit in={true}>
        <Card className={classes.card}>
            <CardHeader title={title} />
            <CardContent className={classes.main}>
                <Typography variant="body1" component="p">
                    <b>Build Number</b> {buildNumber}
                </Typography>
                <Typography variant="body1" component="p">
                    <b>Build Id</b> {buildId}
                </Typography>
                <Typography variant="body1" component="p">
                    <b>Branch Name</b> {branchName}
                </Typography>
                <Typography variant="body1" component="p">
                    <b>Commit Hash</b> {commitHash}
                </Typography>
            </CardContent>
        </Card>
    </Zoom>
);

export default AboutPage;

When the above page is viewed it looks like this:

And that's it! Our app is clearly telling us what version is being run, both on the server and in the client. Thanks to Scott Hanselman for his work which inspired this.

Sunday 17 January 2021

Azure Easy Auth and Roles with .NET and Microsoft.Identity.Web

I wrote recently about how to get Azure Easy Auth to work with roles. This involved borrowing the approach used by MaximeRouiller.Azure.AppService.EasyAuth.

As a consequence of writing that post I came to learn that official support for Azure Easy Auth had landed in October 2020 in v1.2 of Microsoft.Identity.Web. This was great news; I was delighted.

However, it turns out that the same authorization issue that MaximeRouiller.Azure.AppService.EasyAuth suffers from, is visited upon Microsoft.Identity.Web as well.

Getting set up

We're using a .NET 5 project, running in an Azure App Service (Linux). In our .csproj we have:

    <PackageReference Include="Microsoft.Identity.Web" Version="1.4.1" />

In our Startup.cs we're using:

      public void ConfigureServices(IServiceCollection services) {
            //...
            services.AddMicrosoftIdentityWebAppAuthentication(Configuration);
            //...
      }

      public void Configure(IApplicationBuilder app, IWebHostEnvironment env) {
            //...
            app.UseAuthentication();
            app.UseAuthorization();
            //...
      }

You gotta roles with it

Whilst the authentication works, authorization does not. So whilst my app knows who I am - the authorization is not working with relation to roles.

When directly using Microsoft.Identity.Web when running locally, we see these claims:

[
    // ...
    {
        "type": "http://schemas.microsoft.com/ws/2008/06/identity/claims/role",
        "value": "Administrator"
    },
    {
        "type": "http://schemas.microsoft.com/ws/2008/06/identity/claims/role",
        "value": "Reader"
    },
    // ...

]

However, we get different behaviour with EasyAuth; it provides roles related claims with a different type:

[
    // ...
    {
        "type": "roles",
        "value": "Administrator"
    },
    {
        "type": "roles",
        "value": "Reader"
    },
    // ...
]

This means that roles related authorization does not work with Easy Auth:

[Authorize(Roles = "Reader")]
[HttpGet("api/reader")]
public string GetWithReader() =>
    "this is a secure endpoint that users with the Reader role can access";

This is because .NET is looking for claims with a type of "http://schemas.microsoft.com/ws/2008/06/identity/claims/role" and not finding them with Easy Auth.

Claims transformation FTW

There is a way to work around this issue .NET using IClaimsTransformation. This is a poorly documented feature, but fortunately Gunnar Peipman's blog does a grand job of explaining it.

Inside our Startup.cs I've registered a claims transformer:

services.AddScoped<IClaimsTransformation, AddRolesClaimsTransformation>();

And that claims transformer looks like this:

    public class AddRolesClaimsTransformation : IClaimsTransformation {
        private readonly ILogger<AddRolesClaimsTransformation> _logger;

        public AddRolesClaimsTransformation(ILogger<AddRolesClaimsTransformation> logger) {
            _logger = logger;
        }

        public Task<ClaimsPrincipal> TransformAsync(ClaimsPrincipal principal) {
            var mappedRolesClaims = principal.Claims
                .Where(claim => claim.Type == "roles")
                .Select(claim => new Claim(ClaimTypes.Role, claim.Value))
                .ToList();

            // Clone current identity
            var clone = principal.Clone();

            if (clone.Identity is not ClaimsIdentity newIdentity) return Task.FromResult(principal);

            // Add role claims to cloned identity
            foreach (var mappedRoleClaim in mappedRolesClaims) 
                newIdentity.AddClaim(mappedRoleClaim);

            if (mappedRolesClaims.Count > 0)
                _logger.LogInformation("Added roles claims {mappedRolesClaims}", mappedRolesClaims);
            else
                _logger.LogInformation("No roles claims added");

            return Task.FromResult(clone);
        }
    }

The class above creates a new principal with "roles" claims mapped across to "http://schemas.microsoft.com/ws/2008/06/identity/claims/role". This is enough to get .NET treating roles the way you'd hope.

I've raised an issue against the Microsoft.Identity.Web repo about this. Perhaps one day this workaround will no longer be necessary.

Thursday 14 January 2021

Azure Easy Auth and Roles with .NET (and .NET Core)

If this post is interesting to you, you may also want to look at this one where we try to use Microsoft.Identity.Web for the same purpose.

Azure has a feature which is intended to allow Authentication and Authorization to be applied outside of your application code. It's called "Easy Auth". Unfortunately, in the context of App Services it doesn't work with .NET Core and .NET. Perhaps it would be better to say: of the various .NETs, it supports .NET Framework. To quote the docs:

At this time, ASP.NET Core does not currently support populating the current user with the Authentication/Authorization feature. However, some 3rd party, open source middleware components do exist to help fill this gap.

Thanks to Maxime Rouiller there's a way forward here. However, as I was taking this for a spin today, I discovered another issue.

Where are our roles?

Consider the following .NET controller:

[Authorize(Roles = "Administrator,Reader")]
[HttpGet("api/admin-reader")]
public string GetWithAdminOrReader() =>
    "this is a secure endpoint that users with the Administrator or Reader role can access";

[Authorize(Roles = "Administrator")]
[HttpGet("api/admin")]
public string GetWithAdmin() =>
    "this is a secure endpoint that users with the Administrator role can access";

[Authorize(Roles = "Reader")]
[HttpGet("api/reader")]
public string GetWithReader() =>
    "this is a secure endpoint that users with the Reader role can access";

The three endpoints above restrict access based upon roles. However, even with Maxime's marvellous shim in the mix, authorization doesn't work when deployed to an Azure App Service. Why? Well, it comes down to how roles are mapped to claims.

Let's back up a bit. First of all we've added a dependency to our project:

dotnet add package MaximeRouiller.Azure.AppService.EasyAuth

Next we've updated our Startup.cs ConfigureServices such that it looks like this:

if (Env.IsDevelopment()) {
    services.AddMicrosoftIdentityWebAppAuthentication(Configuration);
else
    services.AddAuthentication("EasyAuth").AddEasyAuthAuthentication((o) => { });

With the above in place, either the Microsoft Identity platform will directly be used for authentication, or Maxime's package will be used as the default authentication scheme. The driver for this is Env which is an IHostEnvironment that was injected to the Startup.cs. Running locally, both authentication and authorization will work. However, deployed to an Azure App Service, only authentication will work.

It turns out that directly using the Microsoft Identity platform, we see roles claims coming through like so:

[
    // ...
    {
        "type": "http://schemas.microsoft.com/ws/2008/06/identity/claims/role",
        "value": "Administrator"
    },
    {
        "type": "http://schemas.microsoft.com/ws/2008/06/identity/claims/role",
        "value": "Reader"
    },
    // ...

]

But in Azure we see roles claims showing up with a different type:

[
    // ...
    {
        "type": "roles",
        "value": "Administrator"
    },
    {
        "type": "roles",
        "value": "Reader"
    },
    // ...
]

This is the crux of the problem; .NET and .NET Core are looking in a different place for roles.

Role up, role up!

There wasn't an obvious way to make this work with Maxime's package. So we ended up lifting the source code of Maxime's package and tweaking it. Take a look:

using Microsoft.AspNetCore.Authentication;
using Microsoft.Extensions.DependencyInjection;
using Microsoft.Extensions.Logging;
using Microsoft.Extensions.Options;
using System;
using System.Collections.Generic;
using System.Linq;
using System.Security.Claims;
using System.Text.Encodings.Web;
using System.Text.Json;
using System.Text.Json.Serialization;
using System.Threading.Tasks;

/// <summary>
/// Based on https://github.com/MaximRouiller/MaximeRouiller.Azure.AppService.EasyAuth
/// Essentially EasyAuth only supports .NET Framework: https://docs.microsoft.com/en-us/azure/app-service/app-service-authentication-how-to#access-user-claims
/// This allows us to get support for Authentication and Authorization (using roles) with .NET
/// </summary>
namespace EasyAuth {
    public static class EasyAuthAuthenticationBuilderExtensions {
        public static AuthenticationBuilder AddEasyAuthAuthentication(
            this IServiceCollection services) =>
            services.AddAuthentication("EasyAuth").AddEasyAuthAuthenticationScheme(o => { });

        public static AuthenticationBuilder AddEasyAuthAuthenticationScheme(
            this AuthenticationBuilder builder,
            Action<EasyAuthAuthenticationOptions> configure) =>
                builder.AddScheme<EasyAuthAuthenticationOptions, EasyAuthAuthenticationHandler>(
                    "EasyAuth",
                    "EasyAuth",
                    configure);
    }

    public class EasyAuthAuthenticationOptions : AuthenticationSchemeOptions {
        public EasyAuthAuthenticationOptions() {
            Events = new object();
        }
    }

    public class EasyAuthAuthenticationHandler : AuthenticationHandler<EasyAuthAuthenticationOptions> {
        public EasyAuthAuthenticationHandler(
            IOptionsMonitor<EasyAuthAuthenticationOptions> options,
            ILoggerFactory logger,
            UrlEncoder encoder,
            ISystemClock clock)
            : base(options, logger, encoder, clock) {
        }

        protected override Task<AuthenticateResult> HandleAuthenticateAsync() {
            try {
                var easyAuthEnabled = string.Equals(Environment.GetEnvironmentVariable("WEBSITE_AUTH_ENABLED", EnvironmentVariableTarget.Process), "True", StringComparison.InvariantCultureIgnoreCase);
                if (!easyAuthEnabled) return Task.FromResult(AuthenticateResult.NoResult());

                var easyAuthProvider = Context.Request.Headers["X-MS-CLIENT-PRINCIPAL-IDP"].FirstOrDefault();
                var msClientPrincipalEncoded = Context.Request.Headers["X-MS-CLIENT-PRINCIPAL"].FirstOrDefault();
                if (string.IsNullOrWhiteSpace(easyAuthProvider) ||
                    string.IsNullOrWhiteSpace(msClientPrincipalEncoded))
                    return Task.FromResult(AuthenticateResult.NoResult());

                var decodedBytes = Convert.FromBase64String(msClientPrincipalEncoded);
                var msClientPrincipalDecoded = System.Text.Encoding.Default.GetString(decodedBytes);
                var clientPrincipal = JsonSerializer.Deserialize<MsClientPrincipal>(msClientPrincipalDecoded);
                if (clientPrincipal == null) return Task.FromResult(AuthenticateResult.NoResult());

                var mappedRolesClaims = clientPrincipal.Claims
                    .Where(claim => claim.Type == "roles")
                    .Select(claim => new Claim(ClaimTypes.Role, claim.Value))
                    .ToList();

                var claims = clientPrincipal.Claims.Select(claim => new Claim(claim.Type, claim.Value)).ToList();
                claims.AddRange(mappedRolesClaims);

                var principal = new ClaimsPrincipal();
                principal.AddIdentity(new ClaimsIdentity(claims, clientPrincipal.AuthenticationType, clientPrincipal.NameType, clientPrincipal.RoleType));

                var ticket = new AuthenticationTicket(principal, easyAuthProvider);
                var success = AuthenticateResult.Success(ticket);
                Context.User = principal;

                return Task.FromResult(success);
            } catch (Exception ex) {
                return Task.FromResult(AuthenticateResult.Fail(ex));
            }
        }
    }

    public class MsClientPrincipal {
        [JsonPropertyName("auth_typ")]
        public string? AuthenticationType { get; set; }
        [JsonPropertyName("claims")]
        public IEnumerable<UserClaim> Claims { get; set; } = Array.Empty<UserClaim>();
        [JsonPropertyName("name_typ")]
        public string? NameType { get; set; }
        [JsonPropertyName("role_typ")]
        public string? RoleType { get; set; }
    }

    public class UserClaim {
        [JsonPropertyName("typ")]
        public string Type { get; set; } = string.Empty;
        [JsonPropertyName("val")]
        public string Value { get; set; } = string.Empty;
    }
}

There's a number of changes in the above code to Maxime's package. Three changes that are not significant and one that is. First the insignificant changes:

  1. It uses System.Text.Json in place of JSON.NET
  2. It uses C#s nullable reference types
  3. It changes the extension method signature such that instead of entering services.AddAuthentication().AddEasyAuthAuthentication((o) => { }) we now need only enter services.AddEasyAuthAuthentication()

Now the significant change:

Where the middleware encounters claims in the X-MS-CLIENT-PRINCIPAL header with the Type of "roles" it creates brand new claims for each, with the same Value but with the official Type supplied by ClaimsTypes.Role of "http://schemas.microsoft.com/ws/2008/06/identity/claims/role". The upshot of this, is that when the processed claims are inspected in Azure they now look more like this:

[
    // ...
    {
        "type": "roles",
        "value": "Administrator"
    },
    {
        "type": "roles",
        "value": "Reader"
    },
    // ...
    {
        "type": "http://schemas.microsoft.com/ws/2008/06/identity/claims/role",
        "value": "Administrator"
    },
    {
        "type": "http://schemas.microsoft.com/ws/2008/06/identity/claims/role",
        "value": "Reader"
    }
]

As you can see, we now have both the originally supplied roles as well as roles of the type that .NET and .NET Core expect. Consequently, roles based behaviour starts to work. Thanks to Maxime for his fine work on the initial solution. It would be tremendous if neither the code in this blog post nor Maxime's shim were required. Still, until that glorious day!

Update: Potential ways forward

When I was tweeting this post, Maxime was good enough to respond and suggest that this may be resolved within Azure itself in future:

There's a prospective PR that would add an event to Maxime's API. If something along these lines was merged, then my workaround would no longer be necessary. Follow the PR here.

Sunday 3 January 2021

Strongly typing react-querys useQueries

If you haven't used react-query then I heartily recommend it. It provides (to quote the docs):

Hooks for fetching, caching and updating asynchronous data in React

With version 3 of react-query, a new hook was added: useQueries. This hook allows you fetch a variable number of queries at the same time. An example of what usage looks like is this (borrowed from the excellent docs):

 function App({ users }) {
   const userQueries = useQueries(
     users.map(user => {
       return {
         queryKey: ['user', user.id],
         queryFn: () => fetchUserById(user.id),
       }
     })
   )
 }

Whilst react-query is written in TypeScript, the way that useQueries is presently written strips the types that are supplied to it. Consider the signature of the useQueries:

export function useQueries(queries: UseQueryOptions[]): UseQueryResult[] {

This returns an array of UseQueryResult:

export type UseQueryResult<
  TData = unknown,
  TError = unknown
> = UseBaseQueryResult<TData, TError>

As you can see, no type parameters are passed to UseQueryResult in the useQueries signature and so it takes the default types of unknown. This forces the consumer to either assert the type that they believe to be there, or to use type narrowing to ensure the type. The former approach exposes a possibility of errors (the user can specify incorrect types) and the latter approach requires our code to perform type narrowing operations which are essentially unnecessary (the type hasn't changed since it was returned; it's simply been discarded).

What if there was a way to strongly type useQueries so we neither risked specifying incorrect types, nor wasted precious lines of code and CPU cycles performing type narrowing? There is my friends, read on!

useQueriesTyped - a strongly typed wrapper for useQueries

It's possible to wrap the useQueries hook with our own useQueriesTyped hook which exposes a strongly typed API. It looks like this:

import { useQueries, UseQueryOptions, UseQueryResult } from 'react-query';

type Awaited<T> = T extends PromiseLike<infer U> ? Awaited<U> : T;

export function useQueriesTyped<TQueries extends readonly UseQueryOptions[]>(
    queries: [...TQueries]
): {
  [ArrayElement in keyof TQueries]: UseQueryResult<
    TQueries[ArrayElement] extends { select: infer TSelect }
      ? TSelect extends (data: any) => any
        ? ReturnType<TSelect>
        : never
      : Awaited<
          ReturnType<
            NonNullable<
              Extract<TQueries[ArrayElement], UseQueryOptions>['queryFn']
            >
          >
        >
  >
} {
    // eslint-disable-next-line @typescript-eslint/no-explicit-any
    return useQueries(queries as UseQueryOptions<unknown, unknown, unknown>[]) as any;
}

Let's unpack this. The first and most significant thing to note here is that queries moves from being UseQueryOptions[] to being TQueries extends readonly UseQueryOptions[] - far more fancy! The reason for this change is we want the type parameters to flow through on an element by element basis in the supplied array. TypeScript 4's variadic tuple types should allow us to support this. So the new array signature looks like this:

queries: [...TQueries]

Where TQueries is

TQueries extends readonly UseQueryOptions[]

What this means is, that each element of the rest parameters array must have a type of readonly UseQueryOptions. Otherwise the compiler will shout at us (and rightly so).

So that's what's coming in.... What's going out? Well the return type of useQueriesTyped is the tremendously verbose:

{ 
  [ArrayElement in keyof TQueries]: UseQueryResult<
    TQueries[ArrayElement] extends { select: infer TSelect }
      ? TSelect extends (data: any) => any
        ? ReturnType<TSelect>
        : never
      : Awaited<
          ReturnType<
            NonNullable<
              Extract<TQueries[ArrayElement], UseQueryOptions>['queryFn']
            >
          >
        >
  >
}

Let's walk this through. First of all we'll look at this bit:

{ [ArrayElement in keyof TQueries]: /* the type has been stripped to protect your eyes */ }

On the face of it, it looks like we're returning an Object, not an Array. There's nuance here; JavaScript Arrays are Objects.

More specifically, by approaching the signature this way, we can acquire the ArrayElement type which represents each of the keys of the array. Consider this array:

[1, 'two', new Date()]

For the above, ArrayElement would take the values 0, 1 and 2. And this is going to prove useful in a moment as we're going to index into our TQueries object to surface up the return types for each element of our return array from there.

Now let's look at the return type for each element. The signature of that looks like this:

  UseQueryResult<
    TQueries[ArrayElement] extends { select: infer TSelect }
      ? TSelect extends (data: any) => any
        ? ReturnType<TSelect>
        : never
      : Awaited<
          ReturnType<
            NonNullable<
              Extract<TQueries[ArrayElement], UseQueryOptions>['queryFn']
            >
          >
        >
  >

Gosh... Well there's a lot going on here. Let's start in the middle and work our way out.

TQueries[ArrayElement]

The above code indexes into our TQueries array for each element of our strongly typed indexer ArrayElement. So it might resolve the first element of an array to { queryKey: 'key1', queryFn: () => 1 }, for example. Next:

Extract<TQueries[ArrayElement], UseQueryOptions>['queryFn']

We're now taking the type of each element provided, and grabbing the type of the queryFn property. It's this type which contains the type of the data that will be passed back, that we want to make use of. So for an examples of [{ queryKey: 'key1', queryFn: () => 1 }, { queryKey: 'key2', queryFn: () => 'two' }, { queryKey: 'key3', queryFn: () => new Date() }] we'd have the type: const result: [() => number, () => string, () => Date].

NonNullable<Extract<TQueries[ArrayElement], UseQueryOptions>['queryFn']>

The next stage is using NonNullable on our queryFn, given that on UseQueryOptions it's an optional type. In our use case it is not optional / nullable and so we need to enforce that.

ReturnType<NonNullable<Extract<TQueries[ArrayElement], UseQueryOptions>['queryFn']>>

Now we want to get the return type of our queryFn - as that's the data type we're interested. So we use TypeScript's ReturnType for that.

ReturnType<NonNullable<Extract<TQueries[ArrayElement], UseQueryOptions>['queryFn']>>

Here we're using TypeScript 4.1's recursive conditional types to unwrap a Promise (or not) to the relevant type. This allows us to get the actual type we're interested in, as opposed to the Promise of that type. Finally we have the type we need! So we can do this:

type Awaited<T> = T extends PromiseLike<infer U> ? Awaited<U> : T;

Awaited<ReturnType<NonNullable<Extract<TQueries[ArrayElement], UseQueryOptions>['queryFn']>>>

It's at this point where we reach a conditional type in our type definition. Essentially, we have two different typing behaviours in play:

  1. Where we're inferring the return type of the query
  2. Where we're inferring the return type of a select. A select option can be used to transform or select a part of the data returned by the query function. It has the signature: select: (data: TData) => TSelect

We've been unpacking the first of these so far. Now we encounter the conditional type that chooses between them:

    TQueries[ArrayElement] extends { select: infer TSelect }
      ? TSelect extends (data: any) => any
        ? ReturnType<TSelect>
        : never
      : Awaited< /*...*/ >
  >

What's happening here is:

  • if a query includes a select option, we infer what that is and then subsequently extract the return type of the select.
  • otherwise we use the query return type (as we we've previously examined)

Finally, whichever type we end up with, we supply that type as a parameter to UseQueryResult. And that is what is going to surface up our types to our users.

Usage

So what does using our useQueriesTyped hook look like?

Well, supplying queryFns with different signatures looks like this:

const result = useQueriesTyped({ queryKey: 'key1', queryFn: () => 1 }, { queryKey: 'key2', queryFn: () => 'two' });
// const result: [QueryObserverResult<number, unknown>, QueryObserverResult<string, unknown>]

if (result[0].data) {
    // number
}
if (result[1].data) {
    // string
}

As you can see, we're being returned a Tuple and the exact types are flowing through.

Next let's look at a .map example with identical types in our supplied array:

const resultWithAllTheSameTypes = useQueriesTyped(...[1, 2].map((x) => ({ queryKey: `${x}`, queryFn: () => x })));
// const resultWithAllTheSameTypes: QueryObserverResult<number, unknown>[]

if (resultWithAllTheSameTypes[0].data) {
    // number
}

The return type of number is flowing through for each element.

Finally let's look at how .map handles arrays with different types of elements:

const resultWithDifferentTypes = useQueriesTyped(
    ...[1, 'two', new Date()].map((x) => ({ queryKey: `${x}`, queryFn: () => x }))
);
//const resultWithDifferentTypes: QueryObserverResult<string | number | Date, unknown>[]

if (resultWithDifferentTypes[0].data) {
    // string | number | Date
}

if (resultWithDifferentTypes[1].data) {
    // string | number | Date
}

if (resultWithDifferentTypes[2].data) {
    // string | number | Date
}

Admittedly this last example is a somewhat unlikely scenario. But again we can see the types flowing through - though further narrowing would be required here to get to the exact type.

In the box?

It's great that we can wrap useQueries to get a strongly typed experience. It would be tremendous if this functionality was available by default. There's a discussion going on around this. It's possible that this wrapper may no longer need to exist, and that would be amazing. In the meantime; enjoy!

Saturday 2 January 2021

Create React App with ts-loader and CRACO

Create React App is a fantastic way to get up and running building a web app with React. It also supports using TypeScript with React. Simply entering the following:

npx create-react-app my-app --template typescript

Will give you a great TypeScript React project to get building with. There's two parts to the TypeScript support that exist:

  1. Transpilation AKA "turning our TypeScript into JavaScript". Back since Babel 7 launched, Babel has enjoyed great support for transpiling TypeScript into JavaScript. Create React App leverages this; using the Babel webpack loader, babel-loader, for transpilation.
  2. Type checking AKA "seeing if our code compiles". Create React App uses the fork-ts-checker-webpack-plugin to run the TypeScript type checker on a separate process and report any issues that may exist.

This is a great setup and works very well for the majority of use cases. However, what if we'd like to tweak this setup? What if we'd like to swap out babel-loader for ts-loader for compilation purposes? Can we do that?

Yes you can! And that's what we're going to do using a tool named CRACO - the pithy shortening of "Create React App Configuration Override". This is a tool that allows us to:

Get all the benefits of create-react-app and customization without using 'eject' by adding a single craco.config.js file at the root of your application and customize your eslint, babel, postcss configurations and many more.

babel-loader ts-loader

So let's do the swap. First of all we're going to need to add CRACO and ts-loader to our project:

npm install @craco/craco ts-loader --save-dev

Then we'll swap over our various scripts in our package.json to use CRACO:

        "start": "craco start",
        "build": "craco build",
        "test": "craco test",

Finally we'll add a craco.config.js file to the root of our project. This is where we swap out babel-loader for ts-loader:

const { addAfterLoader, removeLoaders, loaderByName, getLoaders, throwUnexpectedConfigError } = require('@craco/craco');

const throwError = (message) =>
    throwUnexpectedConfigError({
        packageName: 'craco',
        githubRepo: 'gsoft-inc/craco',
        message,
        githubIssueQuery: 'webpack',
    });

module.exports = {
    webpack: {
        configure: (webpackConfig, { paths }) => {
            const { hasFoundAny, matches } = getLoaders(webpackConfig, loaderByName('babel-loader'));
            if (!hasFoundAny) throwError('failed to find babel-loader');

            console.log('removing babel-loader');
            const { hasRemovedAny, removedCount } = removeLoaders(webpackConfig, loaderByName('babel-loader'));
            if (!hasRemovedAny) throwError('no babel-loader to remove');
            if (removedCount !== 2) throwError('had expected to remove 2 babel loader instances');

            console.log('adding ts-loader');

            const tsLoader = {
                test: /\.(js|mjs|jsx|ts|tsx)$/,
                include: paths.appSrc,
                loader: require.resolve('ts-loader'),
                options: { transpileOnly: true },
            };

            const { isAdded: tsLoaderIsAdded } = addAfterLoader(webpackConfig, loaderByName('url-loader'), tsLoader);
            if (!tsLoaderIsAdded) throwError('failed to add ts-loader');
            console.log('added ts-loader');

            console.log('adding non-application JS babel-loader back');
            const { isAdded: babelLoaderIsAdded } = addAfterLoader(
                webpackConfig,
                loaderByName('ts-loader'),
                matches[1].loader // babel-loader
            );
            if (!babelLoaderIsAdded) throwError('failed to add back babel-loader for non-application JS');
            console.log('added non-application JS babel-loader back');

            return webpackConfig;
        },
    },
};

So what's happening here? The script looks for babel-loader usages in the default Create React App config. There will be two; one for TypeScript / JavaScript application code (we want to replace this) and one for non application JavaScript code. I'm actually not too clear what non application JavaScript code there is or can be, but we'll leave it in place; it may be important.

You cannot remove a single loader using CRACO, so instead we'll remove both and we'll add back the non application JavaScript babel-loader. We'll also add ts-loader with the transpileOnly: true option set (to ensure ts-loader doesn't do type checking).

Now the next time we run npm start we'll have Create React App running using ts-loader and without having ejected. If we want to adjust the options of ts-loader further then we're completely at liberty to do so, adjusting the options in our craco.config.js.

If you value debugging your original source code rather than the transpiled JavaScript, remember to set the "sourceMap": true property in your tsconfig.json.

Finally, if we wanted to go even further, we could remove the fork-ts-checker-webpack-plugin and move ts-loader to use transpileOnly: false so it performs type checking also. However, generally it may be better to stay with the setup with post outlines for performance reasons.